Pages

31/10/2012

Deep Freeze ကို Password ေျပာင္းျခင္း , Uninstall လုပ္ျခင္း (How To Uninstall Deep Freeze )

How to uninstall deep freeze
kyaw: [SB] Deep Freeze Standard Edition Ver. 6.62.020.3058 do not uninstall ...help...brother....
ဒီ Tools ေလးက Deepfreeze Latest Version 7.0 ထိသံုးႏိုင္ျပီး  Deepfreeze ကို ျဖဳတ္ခ်ဖို႔ အတြက္ေရာ  Password ေျပာင္းဖို႔ အတြက္ပါ သံုးႏိုင္ပါတယ္။

1. ပထမဆံုး ဒီ  Deep Freeze Password remover ေလးကို ေဒါင္းယူပါ။

2. Run လိုက္ပါ။

Deep Freeze password remover
3.  “Open new process”  ကိုေရြးပါ  Start ကို ႏွိပ္ပါ သူ႕ဘာသာသူ အလုပ္လုပ္ေနပါလိမ့္မယ္ .. ခဏေနရင္ 
How to uninstall Deep Freeze1
 (Error Message တစံုတရာ တတ္လာခဲ့ရင္  “Start” ကိုသာထပ္ႏွိပ္ေပးလိုက္ပါ)
How to uninstall Deep Freeze final
4.  ဒီပံုထဲကလို တတ္လာရင္ “Boot Thawed”  ကိုေရြးေပးျပီး OK > Restart ခ်ေပးလိုက္ပါ ။
Window ျပန္တက္လာရင္ Desktop ရဲ႕ ညာဘက္ေထာင့္က Tray Icon ထဲမွာ
Deep Freeze logo ေလးက ၾကက္ေျခခက္ေလးနဲ႔ျပေနမွာပါ။


Deep Freeze ကိုဖြင့္ျပီး Password အသစ္ကို ေျပာင္းလိုကေျပာင္းပါ (သို႔)  Uninstall လုပ္ခ်င္ရင္လည္းရပါျပီ...။

အဆင္ေျပပါေစ...။

Enjoy n uninstall Deep Freeze…
Ref:http://techotoys.net

My Computer မွ D:,E:,G: စ,တဲ႔ Drive ေတြေပ်ာက္ေနရင္ ျဖည္ရွင္းနည္း

Fix Missing Drive in Windows 7
My Computer မွာ  Drive D: E: F: G: စ,တဲ႔ Drive ေတြေပ်ာက္ေနရင္ အလြယ္တကူ ျပန္ေဖၚယူႏိုင္ပါတယ္...။  ကိုယ္တိုင္ၾကံဳဖူးတာပါ ... ဟိုေန႔က Window ျပန္တင္အျပီး D: Drive တစ္ခုလံုး လံုးဝေပ်ာက္သြားပါတယ္.. အေရးၾကီးတာေတြ ထည့္ထားတာဆိုေတာ့ ရုတ္တရက္ ပူထူသြားတာျပီး ဘာလုပ္လို႔ ဘာကိုင္ရမွန္း မသိဘူးျဖစ္သြားပါတယ္... ဒါနဲ႔ ဒီနည္းလမ္းေလးနဲ႔ ျပန္အဆင္ေျပသြားလို႔ မသိေသးသူမ်ားအတြက္ ျပန္လည္မွ်ေဝေပးလိုက္ပါတယ္ ... 100% အဆင္ေျပပါတယ္..။

Start > Search Box ေလးထဲမွာ  diskmgmt.msc  ကိုေရးထည့္ေပးျပီး  Enter  ေခါက္ပါ Disk Management Box ေပၚလာရင္ ပံုထဲကလို ေပ်ာက္ေနတဲ႔ Drive Partition ေပၚကို Right Click နဲ႔ “Change Drive Letter and Paths”  ေရြးျပီး....


ပံုထဲကအတိုင္း ေပ်ာက္ေနတဲ႔ D: (or) E: နာမည္တခုခု ေရြးေပးျပီး OK ကိုႏွိပ္လိုက္ပါ...


My Computer ကို ျပန္ဖြင့္ၾကည့္လိုက္ပါ ေပ်ာက္ေနတဲ႔ Drive ေလးျပန္ေရာက္ေနပါျပီ...။

အားလံုး အဆင္ေျပၾကပါေစ..

HOW TO Root Samsung Galaxy Note With One Click


Prerequisites
Before you root any Android phone, you need to back up your phone’s data. You can back up your contacts to the SD Card and to back up your Applications you can use ASTRO File Manager. In case you need to reset your phone, you can make use of the back up files to restore those applications.


Disclaimer: BlogoTech is not responsible for any damage that might be caused to your device during this process though the possibility of any damage is negligible. Try this at your own risk. Also note, rooting your phone will void your warranty.

Requirements

Steps to root your Note

      1. Download Easy Rooting Toolkit using the link above and extract the contents to a separate folder.
      2. Enable USB Debugging by going to Settings>Applications>Development and make sure USB Debugging is checked.
      3. Connect your Samsung Galaxy Note to the PC via USB Cable and make sure you set it to Charge Only mode.
      4. Open the folder where you have extracted the files in the first step and run runme.bat to root your Note.
      5. After this you need to follow the instructions you get on the screen to root your Note easily.
ref:http://www.blogotechblog.com

မိမိ ကြန္ျပဴတာမွာ Software ေတြ Install မလုပ္ေစခ်င္ရင္ (WinGuard Pro 2013)


ကြန္ျပဴတာမွာ Software ေတြ ေနာက္ထပ္ သြင္းလို႔ျဖဳတ္လို႔ မရေအာင္ ဘယ္လိုပိတ္ရမလဲ ခင္ဗ် Software ရွိရင္ သုံးနည္းေလး ေျပာျပေပးပါခင္ဗ်ာ...။

မိမိ ကြန္ျပဴတာမွာ Software ေတြ Install လုပ္တာကို တားဆီးေပးတဲ႔ ေဆာ့ဝဲလ္ေလးပါ....  Programs, Applications, EXE Files, Internet Explorer, Chrome and FireFox,      
Block Software Installations
  စ တာေတြနဲ႔ တျခား Features ေတြလည္းပါပါေသးတယ္ Folder ေတြကိုလည္း Password ေပးျပီး Lock ခ်ထားမ်ိဳး နဲ႔ ... တျခား Features ေတြကိုေတာ့ ကိုယ္တိုင္ စမ္းသပ္ၾကည့္လိုက္ပါ...။


With WinGuard Pro users can add Password Protection to Windows Applications, including Web Pages. In addition, 128 bit AES File Encryption, keeps users from accessing your private data, whether it be your private photo's, bank details, whatever. WinGuard Pro is packed with added extra's too! Keep users out of areas you don't want them to be in, such as; Control Panel, File System and the Internet.

Features :


* Built-in programs : around 20 common programs built-in for locking 
* Lock Programs, Applications, EXE Files with a Password 
* Encrypt Files and Folders 128 bit AEs 
* Password Lock Web Browser, inc. Internet Explorer, Chrome and FireFox 
* Screen blank in emergencies, leaving only a password box 
* Lock more features, like; Desktop, Windows Explorer, My Computer, Internet Access and Downloading and more. 

With WinGuard Pro 2013, users can Password Protect Windows Applications and Web Pages. Keep users out of areas you don't want them, such as; Control Panel, File System and the Internet.
Plus..128 bit AES File Encryption, keeps users from accessing your private data, such as your photo's, bank details.


Key Features:
  • Password Protect Windows Programs
  • File Encryption
  • Block Internet
  • Block Software Install
  • Home Page: http://www.winguardpro.com/


ေနာက္တစ္နည္း

ဒါကေတာ့ဘာ Software မသံုးပဲ Registry ကေန ဝင္ျပီး ပိတ္တဲ႔နည္းပါ...  မူရင္း အတိုင္းတင္ေပးလိုက္ပါတယ္ .. ေရွ႕ကပို႔စ္ ေတြမွာလည္း Registry ထဲဝင္ျပင္တဲ႔ နည္းေတြ ရွိပါတယ္ .. လုပ္နည္းေတြက အတူတူပါပဲ ေရးေပးရမဲ့ စာေၾကာင္းေတြသာ ကြဲသြားမွာပါ..။


For one or other reason you might want to block an application on your PC so that no one else can run it. You can use this trick to play a prank on your friends or to stop your child from playing games.  Whatever is the reason, follow the simple steps given below to block any program on Windows 7 without using any software.
Click on Start and type regedit, press enter.
Navigate to  

HKEY_CURRENT_USER\Software\Microsoft\Windows\CurrentVersion \Policies\Explorer

In the right side panel, right click in the empty area and point to New, and then click on 

DWORD Value
.


Type DisallowRun, and press ENTER.


Double-click the DisallowRun value that you created in the previous step.

Type 1 in the Value data box, and click OK.

Right-click the following registry key : 


HKEY_CURRENT_USER\Software\Microsoft\Windows\CurrentVersion\Polici


es\Explorer
. Point to New, and select Key:


Type DisallowRun, and press ENTER.

How to block/ban applications on Windows 7 without using any software

For each program you want to block, create a new string value in the DisallowRun subkey . Use consecutive numbers to name the string values (starting with 1), and use the executable file name of the program as the data for the string value.For example, if you want to restrict users from running Internet Explorer:
Navigate to the following key in Registry Editor:

HKEY_CURRENT_USERSoftware\MicrosoftWindows\CurrentVersion\Policies\Explorer\DisallowRun. 

Then right click in the right side panel and create a new string 

value. Type 1, and then press ENTER.
Double-click “1″ that you created in the previous step.
Type iexplore.exe in the Value data box, and then click OK.
Quit Registry Editor, and restart your explorer or computer to load new settings.
After restarting your computer try to run internet explorer. If you followed this correctly then you will see an error message similar to below image.
To regain access simply delete the key which you created during the process and restart your computer. Have fun ;-)
Ref: http://tipsfromgeek.com

အဆင္မေျပေသးရင္.... 

ဒါေလးကိုသံုးပါ  Programs ေတာ္ေတာ္မ်ားမ်ားကို ေရြးျပီး ပိတ္ေပးႏိုင္ပါတယ္ ....


ဝင္းကမာၻေက်ာ္

မိမိ စက္ထဲက ထုတ္မရ  ျဖဳတ္မရတဲ႔ Software ေတြ Programs ေတြကို အစ အန မက်န္ေအာင္ ထုတ္ပစ္ေပးတဲ႔ ေဆာဝဲလ္ေလးပါ .... Full Version ျဖစ္ေအာင္ Crack ခ်ိဳးနည္းေလးပါ တင္ေပးလိုက္ပါတယ္ (ခဏ ခဏ ေမးခံေနရလို႔ပါ)

Revo Uninstaller – innovative freeware uninstall utility. Uninstall, delete, remove programs and solve uninstalling problems. Revo Uninstaller helps you to uninstall and remove unwanted programs installed on your computer even if you have problems uninstalling and cannot uninstall them from “Windows Add or Remove Programs” control panel applet. Revo Uninstaller is a much faster and more powerful alternative to “Windows Add or Remove Programs” applet! With its advanced and fast algorithm, Revo Uninstaller analyzes an application’s data before uninstall and scans after you uninstall an application. After the program’s regular uninstaller runs, you can remove additional unnecessary files, folders and registry keys that are usually left over on your computer. Even if you have a broken installation, Revo Uninstaller scans for an application’s data on your hard disk drives and in the Windows registry and shows all found files, folders and registry keys so you can delete them.

With its unique “Hunter mode”, Revo Uninstaller offers you some simple, easy to use, but effective and powerful approaches to manage (uninstall, stop, delete, disable from auto starting) and to get information about your installed and/or running programs.
Revo Uninstaller gives you another 8 handy and powerful tools to clean up your system.


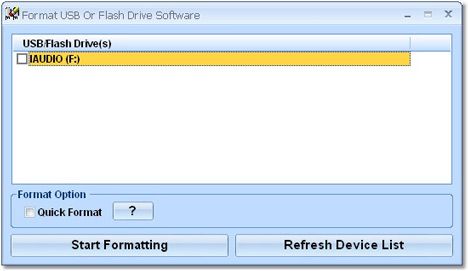
Format USB Or Flash Drive Software v7.0

format usb or flash drive

USB , Memory Card. Flash Drive ေတြ Format ခ်မရျဖစ္ေနရင္ ဒါေလးသံုးၾကည့္ပါ...။
Format USB Or Flash Drive Software is a handy and reliable application designed to format removable drives.

Samsung Galaxy Mini GT-S5570 Root & ျမန္မာ Font ထည့္နည္း


www.winkabarkyaw.blogspot.com
Samsung mini GT-S5570 ဖုန္းအတြက္ပါ....
ဒီထက္ပုိၿပီးနည္းပညာေတြ တုိးတက္ကၽြမ္းက်င္ ေအာင္ျမင္ပါေစဗ်ာ....

ေတာင္းဆိုထားလို႔ ျပန္လည္မွ်ေဝေပးလိုက္ပါတယ္...။
ျမန္မာစာေတြ ေရး/ဖတ္ႏိုင္ဖို႔အတြက္ Root အရင္လုပ္ေပးရမွာပါ...။ မိမိ ဖုန္းက Android Version 2.3.3 (or) 2.3.4   ျဖစ္ရပါမယ္...
Root မလုပ္ခင္ ဖုန္းထဲက အေရးၾကီးတဲ႔ Data ေတြကို ကြန္ပ်ဴတာ နဲ႔ ခ်ိတ္ျပီး Back Up လုပ္ေပးထားပါ...
ဘက္ထရီ 60% ရဲ႕အထက္မွာ ရွိေနပါေစ...
မိမိ ဖုန္းမွာ Settings မွ Applications>Development>USB Debugging ကို Enable လုပ္ေပးထားပါ...

ဒီ Root Zip ဖိုင္လ္ေလးကို ေဒါင္းယူပါ....

အဲ့ဒီ Zip ဖိုင္လ္ေလးကို ဒီအတိုင္းဘာမွမလုပ္ဘဲ ဖုန္းထဲက SD Card ထဲကို Copy ကူးထည့္ေပးလိုက္ပါ...
ဖုန္းကို ပိတ္ပါ (Power Off လိုက္ပါ)

Volume up+ Key နဲ႔ OK Home button ကို တစ္ျပိဳငိထဲ ႏွိပ္ထားပါ ..
ခဏေနရင္  Recovery mode ထဲေရာက္သြားပါလိမ့္မယ္...

Volume Key  + , -  Key ကို အသံုးျပဳျပီး .. Update from SD Card ကိုေရြးေပးျပီး ေစာေစာက Copy ကူးထည့္ေပးထားတဲ႔  Update Zip ဖိုင္လ္ကို ေရြးေပးလိုက္ပါ...

ခဏေစာင့္ျပီး  Reboot system now ေပၚလာရင္ OK Home Button ကိုႏွိပ္ေပးျပီး ဖုန္းကို Restart ခ်ေပးလိုက္ပါ....
ဖုန္းျပန္တတ္လာရင္ Superuser ေလးေတြ႕ရရင္ Root လုပ္တာ ေအာင္ျမင္သြားပါျပီ...

=============================================
ျမန္မာလို ေရး/ဖတ္ ႏိုင္ဖို႔အတြက္ေတာ့ Zawgyi Font  နဲ႔ Frozen keyboard ကိုေဒါင္းရပါမယ္။

 Download Zawgyi-One TTF 

 Download Frozen Keyboard

ေဒါင္းယူျပီး  ႏွစ္ခုစလံုးကို ဖုန္းထဲမွာ Install လိုက္ပါ။

ျပီးရင္ Settings > Locale and text မွာ FrozenKeyboard ကို အမွန္ျခစ္ေပးပါ .. ျပီးေတာ့ 

အေပၚနားက Select input method မွာလည္း FrozenKeyboard ကို ေရြးေပးပါ။

ျပီးရင္ ျပန္ထြက္ျပီး Settings > Display ထဲက Font style ထဲဝင္ျပီး Zawgyi One TTF ကိုေရြးေပးပါ။

Restart ခ်ေပးလိုက္ပါ။

 ျပန္တက္လာရင္ ျမန္မာလို ေရး/ဖတ္ လို႔ရသြားပါျပီ....။

Credit: http://www.newandroidupdates.com

Skype 5.10.0.116 (Offline Installer)


ဒါေလးကေတာ့ ျမန္မာျပည္က မူရင္းဆိုက္ဒ္ကေန ေဒါင္းရတာ အဆင္မေျပဘူးေျပာလာလို႔  Skype Offline Installer ေလး တင္ေပးလိုက္ပါတယ္ ... ခုလက္ရွိ ေနာက္ဆံုး Version ပါ..... အထဲမွာ ပါတဲ႔ Setup.exe ကို Double Click ေပးလိုက္တာနဲ႔ Skype ကို အဆင္ေျပေျပသံုးႏိုင္ပါျပီ....

Title: Skype
Version: 5.10.0.116 - Offline Installer
Release: 17 Juli 2012
Publisher: Skype
Size: 24.46 MB


Smadav 9.1 Pro 2012 Update + Serial

အင္ဒိုနီးရွား ကထုတ္တဲ႔ Antivirus ေလးပါ.... ေပါ့ေပါ့ ပါးပါးနဲ႔ Virus ေတာ္ေတာ္မ်ားမ်ားကို ရွင္းလင္းေပးႏိုင္ပါတယ္... အရင္က တင္ေပးထားတဲ႔ Link အလုပ္ မလုပ္ေတာ့လို႔ အခုေနာက္ဆံုးထြက္ Update Version ေလးကို ျပန္တင္ေပးလိုက္ပါတယ္...။


Serial Key:

    Recomendasi  :  PERSONAL

    USER  : mumu by inovLy
    PASSWORD   : 085700526008

    Recomendasi  : WARNET

    USER  : inovLy.to.warnet
    PASSWORD   : 771277788662

    Recomendasi  : PERUSAHAAN

    USER   : inovLy.to.perusahaan
    PASSWORD   : 778877801094


KP Anti Mosquitoes (ျခင္ ေျပးေစတဲ႔ Software)

 Anti Mosquito ဆုိတဲ့ Software ေလးက ျခင္ နိမ္နင္းေပးတဲ႔ Software ေလးပါ.... ...  ေတာင္းထားလို႔  ျပန္လည္မွ်ေဝေပးလိုက္ပါတယ္..  ျဖစ္ႏိုင္ မျဖစ္ႏိုင္ေတာ့ ကြ်န္ေတာ္လည္း မသိပါဘူး။ ျခင္ေတြေျပးေစေအာင္ လူေတြ မၾကားႏိုင္ေလာက္တဲ႔ အသံ တစ္မ်ိဳးကို ထုတ္လႊတ္ျပီး  ျခင္ နဲ႔ တျခား အင္းဆက္ပိုးေတြ ကို ေမာင္းထုတ္ေပးႏိုင္တယ္လို႔ ဆိုထားပါတယ္...။
 Android ဖုန္းအတြက္ကို  Google Play မွ  တဆင့္ ေဒါင္းယူႏိုင္ပါတယ္ ..။
   
KP Anti Mosquitoes
This program produces sound in the range of 16000Hz to 20000Hz which is beyond the audiable range of humans. Pests and other animals can though hear the very same frequency. This sound produces an undesirable effect on mosquitos and other pests thus restrains them from flying.

I can hardly imagine, how author of this tool and anyone out there could get 16KHz+ out of his speakers, but... Moreover, human ear can hear 40HZ to 20KHZ, mosquitos 18k unto 24k, PC loudspeakers can produce sound upto 17/18k.

Hence, the program will probably kill your acoustic, instead of killing the mosquito arround you.

Besides critical thinking, it was proven that these type of things are not effective.

If you still want to try, you can download this software at
Home: www.allmosquitos.com


ဖုန္းကိုလႈပ္လုိက္ရံုနဲ႕ Screen Shot လုပ္ႏုိင္တဲ့ application

Screenshot No Root Shakeshot
ဖုန္းကိုလႈပ္လုိက္ရံုနဲ႕ Screen Shot လုပ္ႏုိင္တဲ့ application ေလးပါ။
  install > open > accept > hide
ကိုယ္လုိခ်င္တဲ့ ပံုကို phone screen မွာေပၚေစျပီး ဖုန္းကိုလႈပ္လုိက္ပါ။
FEATURES:
- Easy Shake To Capture
- Crystal Clear Picture Quality
- Easy Cropping Before Saving
- Paint Feature for Pic Editing
- Save As Png or Jpeg
- Clean and Simple Interface
- Easy Enabler/Disabler
- 1 Click Activator for Restarts
- Shake Sensitivity Control
- Perfect for any Android Phone
- Works with any Unrooted Android
 Once you will install the app on your phone, in most cases you will find the option to “Shake and Capture” to get the screenshot of the device screen. In this case, you just need to initiate the app for one time and keep that running in background. After that, when you will shake your phone, it will take a screenshot of the device’s current open screen and save that on SD card in Gallery. You can browse the snap and then share that from there.
If you are not comfortable with “Shake and Capture”, you may choose other options from app settings page on your phone.

ဖုန္း အမ်ိဳးအစားေတြမ်ားတာေၾကာင့္ အားလံုးအဆင္ေျပေအာင္ ေနာက္ထပ္ ႏွစ္မ်ိဳးပါတြဲတင္ေပးလိုက္ပါတယ္...။
(or)

Shortcut Virus Remover


ဒီ Shortcut Virus Remover ေဆာ့၀ဲဟာ အေတာ္ေလးအသံုးတည့္ပါတယ္။ မိမိ Enternal HDD, UBD Pen Drive တို႔ကို Shortcut Virus ၀င္ေရာက္သြားျပီးဆိုရင္ ၎တို႔မွာ ရွိတဲ့ဖိုလ္ဒါမွန္သမွ် Shortcut ေတြျဖစ္သြားျပီး အဲဒီ Enternal HDD, USB Pen Drive တို႔မွာ ဖိုလ္ဒါေတြရွိရင္လဲ ျမင္ရေတာ့မွာမဟုတ္ပါဘူး။ အဲဒီျပႆနာကိုေျဖရွင္းနိုင္ဖို႔ ဒီေဆာ့၀ဲေလးကိုအ အသံုးျပဳလိုက္ရင္ အဆင္ေျပမွာပါ။ Shortcut Virus Remover V3 နဲ႔ V2 (Beta) ႏွစ္ခုစလံုးတင္ေပးလိုက္တယ္။ ၾကိဳက္ တာေဒါင္းေပါ့ဗ်ာ။ V3 ကေတာ့ ပုိေကာင္းတာေပါ့ေလ။ ေဆာ့၀ဲက Portable လဲျဖစ္တယ္။ ေဆာ့၀ဲကအသံုးျပဳရတာလြယ္ ပါတယ္။ ကဲ ေအာက္ပါေဒါင္းဗ်ာ...


Online ကေန File,Software ေတြကို လြယ္ကူျမန္ဆန္စြာ Share ရေအာင္ဗ်ာ

အရင္က တျခား Website တစ္ခုနဲ႔ ဖိုင္ေတြ Software ေတြ Share နည္းတစ္ခုကို တင္ေပးခဲ့ဖူးပါတယ္.. ဒီေန႔က သူငယ္ခ်င္းတစ္ေယာက္က အြန္လိုင္းကေန File ေတြ ဘယ္လို Share ရမလဲဆိုျပီးေမးလားတာနဲ႔ ရွာေဖြေမႊေႏွာက္ရင္း ေနာက္ထပ္ လြယ္ကူျမန္ဆန္တဲ႔ Website ေလးတစ္ခု ေတြ႕တာနဲ႔ စမ္းၾကည့္လိုက္ေတာ့ ေတာ္ေတာ္ေလး အဆင္ေျပတာေတြ႕ရလို႔ ျပန္လည္မွ်ေဝေပးလိုက္ပါတယ္ .. မိမိ ပို႔တဲ႔ ဖိုင္လ္ေတြ ,Software ေတြ လံုျခံဳဖို႔ အတြက္လည္း Password ပါ ခံျပီး ပို႔လို႔ရပါတယ္...။

Window 7 မွာပါတဲ႔ File Share နည္းထက္ ပိုမို လြယ္ကူျမန္ဆန္တာေၾကာင့္ ဒီနည္းေလးကိုပဲ မွ်ေဝေပးလိုက္ပါတယ္.....

Browse ကတဆင့္ မိမိပို႔ခ်င္တဲ႔ (Share ခ်င္တဲ႔ ) File,Software ကိုေရြးေပးလိုက္ပါ ....

   စကၠန္႔ပိုင္းအတြင္းမွာပဲ မွ်ားျပထားတဲ႔ Link တစ္ခုထုတ္ေပးပါလိမ့္မယ္... လံုျခံဳဖို႔အတြက္ Password ေပးခ်င္ရင္ေတာ့ ေအာက္က အကြက္ေလးထဲမွာ အဆင္ေျပသလို ထည့္ေပးႏိုင္ပါတယ္...
ျပီးရင္ အဲ့ဒီ Link ကို Copy ကူးျပီး Gtalk ကေနျဖစ္ျဖစ္ တေနရာရာကေန လက္ခံမဲ့သူဆီကို ပို႔လိုက္ပါ...  Password ေပးထားရင္ Password နဲ႔အတူေပါ့ဗ်ာ...

 လက္ခံမဲ့လူဆီ Link ေလးေရာက္လာရင္ Dobule Click ႏွိပ္၍ျဖစ္ေစ , Copy ကူးျပီး  Browser ရဲ႕ Address Bar မွာ Paste > Enter ေခါက္၍ျဖစ္ေစ .... 


Download ကို ႏွိပ္ျပီး အလြယ္တကူ လက္ခံရယူႏိုင္ပါျပီ (Password ေပးထားရင္ Password ထည့္ေပးရမွာပါ).. လြယ္ကူ ရိုးရွင္းတဲ႔ အျပင္ အရမ္းလည္းျမန္ပါတယ္...။
အားလံုး စမ္းသပ္ရင္း ေပ်ာ္ရႊင္ၾကလိမ့္မယ္လို႔ ေမွ်ာ္လင့္ပါတယ္ခင္မ်ာ....
 မူရင္း........
ဝင္းကမာၻေက်ာ္

07/10/2012

G-Mail အေကာင့္လြယ္လြယ္ ေဖာက္ရေအာင္

ကၽြန္ေတာ္ကို ေမးတဲ့အကို ေတြလည္းရွိပါတယ္ .. ကၽြန္ေတာ္လည္း ျပန္မေျဖျဖစ္ဘူး ျဖစ္ေနလို႔ အခုနည္းလမ္း ေလးကို ညီေလးတစ္ေယာက္က ေျပာလို႔ စမ္းၾကည့္လိုက္တာ အဆင္ေျပတာနဲ႕ ျပန္တင္ေပး လိုက္ပါတယ္ .. ကၽြန္ေတာ္တို႔ အခုေနာက္ပိုင္း G-Mail အေကာင့္ေဖာက္ ခ်င္တယ္ဆိုရင္ အရင္တုန္းကလို လြယ္လြယ္ကူကူ ေဖာက္လို႔မရေတာ့ ပါဘူး .. အေကာင့္ တစ္ခုေဖာက္ခ်င္ျပီ ဆိုရင္ Security ပိုင္းအရ ပိုျပီးလံုျခံဳမွဳရွိလာေအာင္ Verification လုပ္ေပးျပီး ကုဒ္ ထည့္ေပးမွ အေကာင့္အသစ္ တစ္ခုကို ေဖာက္လို႔ရမွာျဖစ္ပါတယ္..အခုနည္းလမ္းေလးကေတာ့ မိမိတို႔ကေဖာင္ခ်င္တဲ့ အေကာင့္တစ္ခုကို မိမိတို႔အေကာင့္မွာ ျပန္ျပီး Invite လုပ္ေပးရပါမယ္  . . အဲ့ဒီအခါမွာ G-Mail Service ကေနျပီးေတာ့ အခု Invite လုပ္တဲ့အေကာင့္ဟာ သူတို႔ဆီမွာမရွိေၾကာင္း Mail တစ္ေစာင့္ ျပန္ပို႔ပါလိ္မ့္မယ္ .. ျပီးရင္ အဲ့ဒီမွာ Mail ထဲမွာတင္ အေကာင့္အသစ္ေဖာက္ဖို႔အတြက္ Sing in Link ပါတစ္ခါထဲ ေပးလိုက္ပါမယ္ .. ကၽြန္ေတာ္တို႔က အဲ့ဒီလင့္ကေနျပီး အေကာင့္ ေဖာက္ေပးရမွာ ျဖစ္ပါတယ္ .. ကၽြန္ေတာ္ အဆင္ေျပေျပနဲ႔ လုပ္တက္သြားေအာင္ ေအာက္မွာ ပံုေလးေတြနဲ႔ ရွင္းျပေပးထားပါတယ္ .. 


အရင္ဆံုး မိမိတို႔ရဲ႕ G-Mail မွာ အေကာင့္တစ္ခုကိုအပ္ေပးလိုက္ပါ .. အဲ့ဒီအေကာင့္က သူမ်ားေဖာက္ျပီးသား မျဖစ္ဖို႔လိုပါတယ္ .. အဲ့ဒီေတာ့ ဘယ္လိုအေကာင့္မ်ိဳးကိုအပ္မလည္းဆိုေတာ့ ဥပမာ .. nnnaymin , naymmmin , naayminmaung , naymiinmaung  တို႔လိုပံုစံမ်ိဳးနဲ႔ Invite လုပ္ေပးလိုက္ပါ .. နာမည္ေတြကိုေပါင္းတဲ့ အခါမွာစာလံုးတစ္လံုးထဲကို ႏွစ္ခါေရးတဲ့ပံုစံျဖစ္ပါတယ္ .. ကၽြန္ေတာ္ေအာက္မွာ   ပံုလးေတြနဲ႔လည္း ျပေပးထားပါတယ္ ..


အရင္ဆံုး မိမိတို႔ရဲ႕ G-Mail ကိုဖြင့္လိုက္ပါ .. ျပီးရင္ Invite a Friend ကေနျပီးေတာ့ ကၽြန္ေတာ္အေပၚမွာ နမူနာ ျပခဲ့တဲ့ ပံုစံမ်ိဳးနဲ႔ အေကာင့္တစ္ခုအပ္ေပးလိုက္ပါ .. ျပီးရင္ Send Invite ေပးလိုက္ပါ ..
ေအာက္ကပံုအတိုင္း ေမးလ္၀င္လာပါလိမ့္မယ္ .. ေမးလ္ကိုဖြင့္ၾကည့္လိုက္ပါ ..
ေမးလ္ကိုဖြင့္ျပီးျပီ ဆိုရင္ေတာ့ မိမိထံ၀င္လာတဲ့ ေမးလ္ရဲ႕ ေအာက္ဆံုးမွာ ေအာက္ကပံုမွာ ျပထားသလို Sign up လုပ္ဖို႔ လင့္ေလးေပးထား ပါလိမ့္မယ္ .. အဲ့ဒီလင့္ေလးကို Copy ကူးလိုက္ပါ .. ျပီးရင္ Internet Explorer ကေန အေကာင့္အသစ္တစ္ခု ေဖာက္ေပးရပါျဖစ္ပါတယ္ .. 


အေပၚကပံုအတိုင္း Sing up Link ေလးကို Copy ကူးျပီးျပီဆိုရင္ေတာ့ Internet Explorer ကိုဖြင့္လိုက္ပါ .. ျပီးရင္ Copy ေပးထားတဲ့လင့္ေလးကို Internet Explorer မွာဖြင့္ျပီး အေကာင့္တစ္ခု ေဖာက္လိုက္ယံုပါပဲ ..

ဒီေနရာမွာ တစ္ခုသတိထားရမွၾက Re-enter password ရိုက္ျပီးသြားရင္ ေအာက္က Stay signed in နဲ႔  Enable Web History တို႔မွာ အမွန္ျခစ္ေလးေတြကို ျဖဳတ္ေပးဖို႔ လိုပါလိမ့္မယ္ .. .


အားလံုးပဲ ဒီေလာက္ဆိုရင္ေတာ့ G-Mail အေကာင့္တစ္ခုကို Verification လုပ္စရာမလိုပဲ ေဖာက္လို႔ ရသြားပါ လိမ့္မယ္ ..

မိမိ ကြန္ျပဴတာမွာ Software ေတြ Install မလုပ္ေစခ်င္ရင္ (WinGuard Pro 2013)


ကြန္ျပဴတာမွာ Software ေတြ ေနာက္ထပ္ သြင္းလို႔ျဖဳတ္လို႔ မရေအာင္ ဘယ္လိုပိတ္ရမလဲ ခင္ဗ် Software ရွိရင္ သုံးနည္းေလး ေျပာျပေပးပါခင္ဗ်ာ...။

မိမိ ကြန္ျပဴတာမွာ Software ေတြ Install လုပ္တာကို တားဆီးေပးတဲ႔ ေဆာ့ဝဲလ္ေလးပါ....  Programs, Applications, EXE Files, Internet Explorer, Chrome and FireFox,      
Block Software Installations
  စ တာေတြနဲ႔ တျခား Features ေတြလည္းပါပါေသးတယ္ Folder ေတြကိုလည္း Password ေပးျပီး Lock ခ်ထားမ်ိဳး နဲ႔ ... တျခား Features ေတြကိုေတာ့ ကိုယ္တိုင္ စမ္းသပ္ၾကည့္လိုက္ပါ...။


With WinGuard Pro users can add Password Protection to Windows Applications, including Web Pages. In addition, 128 bit AES File Encryption, keeps users from accessing your private data, whether it be your private photo's, bank details, whatever. WinGuard Pro is packed with added extra's too! Keep users out of areas you don't want them to be in, such as; Control Panel, File System and the Internet.

Features :


* Built-in programs : around 20 common programs built-in for locking 
* Lock Programs, Applications, EXE Files with a Password 
* Encrypt Files and Folders 128 bit AEs 
* Password Lock Web Browser, inc. Internet Explorer, Chrome and FireFox 
* Screen blank in emergencies, leaving only a password box 
* Lock more features, like; Desktop, Windows Explorer, My Computer, Internet Access and Downloading and more. 

With WinGuard Pro 2013, users can Password Protect Windows Applications and Web Pages. Keep users out of areas you don't want them, such as; Control Panel, File System and the Internet.
Plus..128 bit AES File Encryption, keeps users from accessing your private data, such as your photo's, bank details.

Key Features:
  • Password Protect Windows Programs
  • File Encryption
  • Block Internet
  • Block Software Install
  • Home Page: http://www.winguardpro.com/


ေနာက္တစ္နည္း

ဒါကေတာ့ဘာ Software မသံုးပဲ Registry ကေန ဝင္ျပီး ပိတ္တဲ႔နည္းပါ...  မူရင္း အတိုင္းတင္ေပးလိုက္ပါတယ္ .. ေရွ႕ကပို႔စ္ ေတြမွာလည္း Registry ထဲဝင္ျပင္တဲ႔ နည္းေတြ ရွိပါတယ္ .. လုပ္နည္းေတြက အတူတူပါပဲ ေရးေပးရမဲ့ စာေၾကာင္းေတြသာ ကြဲသြားမွာပါ..။


For one or other reason you might want to block an application on your PC so that no one else can run it. You can use this trick to play a prank on your friends or to stop your child from playing games.  Whatever is the reason, follow the simple steps given below to block any program on Windows 7 without using any software.
Click on Start and type regedit, press enter.
Navigate to  

HKEY_CURRENT_USER\Software\Microsoft\Windows\CurrentVersion \Policies\Explorer

In the right side panel, right click in the empty area and point to New, and then click on 

DWORD Value
.


Type DisallowRun, and press ENTER.


Double-click the DisallowRun value that you created in the previous step.

Type 1 in the Value data box, and click OK.


Right-click the following registry key : 


HKEY_CURRENT_USER\Software\Microsoft\Windows\CurrentVersion\Polici


es\Explorer
. Point to New, and select Key:


Type DisallowRun, and press ENTER.


For each program you want to block, create a new string value in the DisallowRun subkey . Use consecutive numbers to name the string values (starting with 1), and use the executable file name of the program as the data for the string value.For example, if you want to restrict users from running Internet Explorer:
Navigate to the following key in Registry Editor:

HKEY_CURRENT_USERSoftware\MicrosoftWindows\CurrentVersion\Policies\Explorer\DisallowRun. 

Then right click in the right side panel and create a new string 

value. Type 1, and then press ENTER.
Double-click “1″ that you created in the previous step.
Type iexplore.exe in the Value data box, and then click OK.

Quit Registry Editor, and restart your explorer or computer to load new settings.

After restarting your computer try to run internet explorer. If you followed this correctly then you will see an error message similar to below image.
To regain access simply delete the key which you created during the process and restart your computer. Have fun 
Ref: http://tipsfromgeek.com

အဆင္မေျပေသးရင္.... 


ဒါေလးကိုသံုးပါ  Programs ေတာ္ေတာ္မ်ားမ်ားကို ေရြးျပီး ပိတ္ေပးႏိုင္ပါတယ္ ....